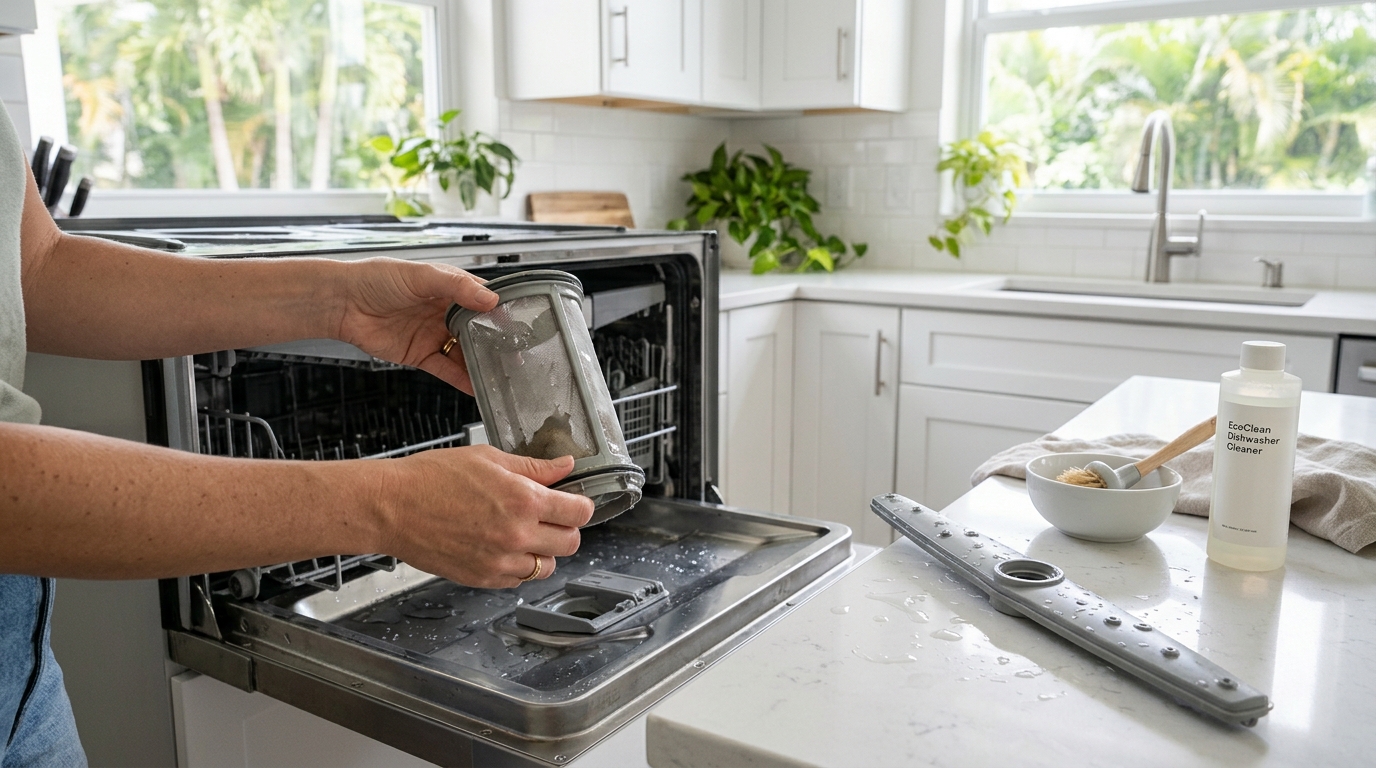
You open the dishwasher and get hit with a smell that's somewhere between low tide and old takeout. Or the glasses come out cloudy and there's grit on the bottom rack. Both problems usually trace back to the same three places. Knowing how to clean a dishwasher properly means dealing with all three: the filter, the spray arms and the gunk hiding around the door.
We clean a lot of Florida kitchens. The dishwasher is the appliance people most often assume cleans itself, and it doesn't. Below is the routine we'd follow, the products worth buying (including the one that's genuinely debated), and how to keep the smell from coming back in a humid house with hard water.
Here's what you'll learn:
- Where dishwasher odors actually come from
- How to find, remove and scrub the filter in about 10 minutes
- How to unclog spray arm nozzles, including limescale from hard water
- Whether to use vinegar or a commercial dishwasher cleaner
- A simple maintenance schedule so you're not doing this every week
Why Your Dishwasher Smells (and Why It Isn't Self-Cleaning)
Every cycle sprays hot water and detergent over the dishes, then drains it. Food particles have to go somewhere. Most of them get caught on purpose, in the filter, so they don't get blasted back onto your clean plates.
The trouble is what happens between cycles. Grease, starch and bits of food sit in the filter, inside the spray arms and in the folds of the door seal. The inside of a closed dishwasher stays warm, damp and dark for hours, which is exactly what bacteria and fungi like.
This isn't only a nose problem. A 2011 study by Zalar and colleagues, published in Fungal Biology, found black yeasts and other fungi living in household dishwashers sampled around the world. A later paper in PLOS ONE put the concern right in its title: the black yeast Exophiala dermatitidis and other opportunistic human fungal pathogens spread from dishwashers to kitchens.
"Opportunistic" generally means these organisms are mainly a worry for people with weakened immune systems, not healthy adults. Still, nobody wants a black film on the appliance that's supposed to clean their forks. In our experience, the rubber door seal and the lip at the bottom of the door are where that film shows up first.
What You Need Before You Start
You don't need anything fancy. Here's the kit we'd put together, and why each item earns its spot:
- A soft toothbrush or dish brush. Filter mesh is fine and can tear. Soft bristles get into it without damage.
- Wooden toothpicks or a bamboo skewer. For clearing spray arm nozzles. Wood won't scratch plastic or widen the holes the way a metal pin can.
- Dish soap. A grease-cutting liquid for scrubbing parts by hand. Never put it in the machine itself.
- White vinegar. For soaking removed spray arms to dissolve mineral scale. Whether to run it through the machine is a separate, debated question (more below).
- Baking soda. A cheap deodorizer for a final rinse.
- A commercial dishwasher cleaner such as Affresh or Finish, if you'd rather skip the vinegar debate.
- Microfiber cloths, an old towel and a shallow bowl. There's usually standing water in the bottom, and you'll want somewhere to put it.
- A flashlight and gloves. Optional, but you'll appreciate both when you look into the filter housing.
In our experience, the first proper clean takes 30 to 45 minutes of hands-on time, plus one empty cycle. After that, maintenance is a few minutes a month.
Step 1: How to Clean a Dishwasher Filter
Start here, because the filter is the most common source of the smell. Most dishwashers sold in the last decade or so use a manual filter you're meant to remove and rinse. Whirlpool's filter-cleaning guide and the other major manufacturers describe essentially the same routine.
Many older models use a self-cleaning filter with a built-in grinder instead. If you don't see a removable cylinder in the floor of the tub, check your manual before you start prying at anything.
- Pull the bottom rack all the way out, or lift it out entirely so you have room to work.
- Find the filter. It's usually a round cylinder in the floor of the tub, near the back or under the lower spray arm.
- Twist and lift. On most models you turn the cylinder counterclockwise, often about a quarter turn, then pull it straight up. Many machines have a flat mesh screen underneath that lifts out next.
- Clear the sump. Use a towel or small cup to soak up standing water. Shine a flashlight in and pull out anything that shouldn't be there: glass shards, fruit pits, jar labels, the occasional bread tie.
- Rinse and scrub. Hold the parts under warm running water and scrub inside and out with the soft brush and a drop of dish soap. Skip steel wool and wire brushes. They'll shred the mesh.
- Check it against the light. Hold the mesh up to a window. If light doesn't come through evenly, there's still grease in it. Soak it in hot soapy water for 10 minutes, then scrub again.
- Reinstall carefully. Flat screen first, then the cylinder, twisting until it locks or the alignment arrows match. A loose filter lets debris slip past into the pump.
How often? Manufacturers disagree. Some say monthly, others every few months. We'd check it monthly, and more often if your household runs the machine daily or doesn't scrape plates much.
Step 2: Clean the Spray Arms and Unclog the Nozzles
If dishes on one rack come out dirty, or you find gritty residue on the top rack, a spray arm is probably clogged. Bosch's spray arm guide recommends removing the arms and rinsing them out, and that matches what we see on almost every brand.
- Spin each arm by hand first. It should turn freely. If it catches, something's in the way or the hub is clogged.
- Take a photo before you remove anything. It saves a lot of guesswork when you put it back together.
- Remove the lower arm. On many models it pulls straight up off its hub. Others unscrew or have a clip. Check your manual if it doesn't come up with gentle pressure.
- Remove the upper arm. It sits under the upper rack and is usually held on by a twist-lock or a plastic nut. If your machine has a third arm or a ceiling sprayer, we'd usually leave it in place and clean it where it is.
- Shake and listen. A rattle means debris inside. Run water through the center opening until it flows cleanly out of the nozzles.
- Clear each nozzle. Poke a wooden toothpick into every hole, then flush again so the debris washes out rather than sitting inside.
- Soak off scale. If you see a white crust around the holes, soak the arm in a sink of hot water with a cup or two of white vinegar for 30 to 60 minutes, then brush and rinse.
- Reinstall and spin-test. Make sure each arm clicks into place and turns freely before you close the door.
Because that vinegar soak happens in the sink, it doesn't touch the machine's rubber seals. That makes it the low-risk way to use vinegar on a dishwasher.
Why Florida Spray Arms Clog Faster
Much of South Florida's tap water comes from the Biscayne Aquifer, which sits in limestone. Water that moves through limestone picks up calcium and magnesium, and those minerals end up as scale on nozzles, heating elements and glassware. If you want your local numbers, Miami-Dade WASD publishes an annual water quality report, and other utilities in Broward, Palm Beach, Pinellas and the Panhandle publish their own.
Two things help. Keep the rinse aid dispenser topped up, because it helps water sheet off instead of leaving spots. And if your machine has a salt reservoir, which some European-made models do, keep it filled. The same minerals cause the cloudy film on your shower glass, which we cover in our guide to removing hard water stains.
Step 3: Scrub the Door Seal, Door Edge and Tub
This is the step most people skip, and it's where a lot of lingering smell lives. The spray reaches the tub walls but not much of the door's outer edges.
- Door gasket. Wipe the rubber seal with a cloth and warm soapy water. Gently fold it back where you can and use the toothbrush on any black specks.
- The bottom lip of the door. Open the door and look at the strip where it meets the tub when closed. Food and grease collect here because the spray barely touches it. Scrub it with soapy water and dry it.
- Detergent dispenser. Old detergent cakes around the flap and can stop it opening fully. A damp toothbrush clears it.
- Racks and utensil basket. Check the bottom of the utensil basket for trapped food. Look for chipped coating on rack tines, since exposed metal will rust and stain dishes.
- Air gap. If there's a small chrome cap next to your faucet, pull it off and clear any gunk inside. A clogged air gap can cause slow drainage and standing water.
- Garbage disposal connection. If your dishwasher drains into the disposal, run the disposal before starting a cycle so the drain path is clear.
For the rest of the kitchen, our guide to deep cleaning your kitchen walks through the other appliances in the same order we use.
Step 4: Run a Cleaning Cycle (Vinegar vs. Commercial Cleaner)
With the filter, arms and seal done, finish with an empty cycle on the hottest setting your machine offers.
Option A: A commercial dishwasher cleaner
Products like Affresh tablets and Finish dishwasher cleaner are made for this job. Put the cleaner where the label says, usually the detergent cup or the floor of the tub, and run a hot, empty cycle. It's the simplest choice if your manual is silent or cautious about vinegar.
Option B: White vinegar, with a caveat
This one is genuinely contested. Some manufacturers and appliance repair techs advise against running vinegar through the machine, because repeated exposure to acid may wear down rubber gaskets over time. Others recommend it. Check your owner's manual for your specific brand before you decide.
If your manual allows it, place a cup of white vinegar upright on the top rack and run a hot cycle. Treat it as an occasional reset, not a weekly habit.
Optional: A baking soda rinse
After either option, sprinkle about a cup of baking soda across the floor of the tub and run a short hot rinse. It helps with lingering odor and loosens light film.
Two hard rules: never combine chlorine bleach with vinegar or with commercial cleaners, because mixing bleach with acids releases chlorine gas. And check your manual before using bleach at all, since it can be rough on stainless steel tubs.
If your dishwasher has a sanitize option, it's worth knowing what that label means. NSF/ANSI 184 is the standard residential dishwashers are tested against for sanitizing claims. It's a useful setting for cutting boards and baby bottles, but it doesn't replace cleaning the filter.
Pro Tip: Before you start any cycle, run the kitchen faucet on hot until the water is actually hot. Dishwashers draw from the same hot water line, and in a lot of Florida homes the water heater sits out in the garage, a long run from the kitchen. Clearing the cold water from the pipe means the first fill starts hot, which helps detergent work and grease rinse away instead of settling in the filter.
How to Keep the Smell From Coming Back in a Florida Kitchen
Cleaning fixes the smell. Keeping it gone is mostly about moisture and habits.
According to the EPA's mold guidance, indoor relative humidity should stay below 60 percent, ideally between 30 and 50 percent. Florida homes fight that number most of the year, and a closed, wet dishwasher is its own little pocket of humidity. That's why the habits below matter more here than in a dry climate. We go deeper on the bigger picture in our post on humidity and mold in Florida homes.
- Crack the door after a cycle. Leave it open an inch or two for an hour or so to let the interior dry. Skip this if toddlers or pets are around, since an open door is a trip and pinch hazard.
- Don't let dirty dishes sit for days. If it'll be a while before the machine is full, use the rinse-only cycle to knock food off.
- Scrape plates. Big scraps and bones go in the trash, not the filter.
- Don't overload. A tall pan that blocks a spray arm means half the machine never gets hit.
- Close the house properly. If you're a snowbird or rent the place out, clean the filter, run an empty cycle and leave the door cracked before you lock up. Coming back to a sealed dishwasher after months away is a reliably unpleasant surprise.
Here's the maintenance schedule we'd suggest. Adjust it to your manual and how often you run the machine.
| Task | How often | Time |
|---|---|---|
| Wipe door gasket and bottom lip of door | Weekly | 2 minutes |
| Remove and rinse filter | Monthly (check your manual) | 10 minutes |
| Empty hot cycle with cleaner | Monthly | 5 minutes plus cycle |
| Remove and clear spray arms | Every few months, or when dishes come out dirty | 15 to 20 minutes |
| Check air gap and rack tines | Every few months | 5 minutes |
Common Mistakes That Make Dishwashers Worse
- Assuming there's no filter to clean. Most newer machines have one, and it's the first place odor builds.
- Scrubbing the filter with steel wool. A torn mesh lets debris reach the pump. Replacement filters cost money; a soft brush doesn't.
- Using a metal pin on the nozzles. It can scratch or widen the holes and change the spray pattern. Stick with wood.
- Not locking the filter back in. If it's not seated and twisted fully, it isn't filtering.
- Putting dish soap in the dishwasher. Hand dish soap foams up and can push suds out of the door onto your floor.
- Running vinegar weekly when your manual says not to. Follow your brand's guidance on gaskets.
- Mixing bleach with vinegar or other cleaners. Never.
- Masking the smell. Scented pods and fresheners cover the problem for a day. The filter is still dirty.
- Ignoring slow drainage. Standing water after a cycle means a clog somewhere. In a condo, a backup that turns into a leak can reach the unit below, so deal with it early.
The Bottom Line
Once you know how to clean a dishwasher, the routine is simple: filter first, then spray arms, then the door seal and edges, then an empty hot cycle. Do the full version once, then keep up with a monthly filter rinse and a weekly gasket wipe, and the smell shouldn't come back. Florida's hard water and humidity just mean you'll want to stay on top of it a bit more than the manual suggests.
If you'd rather leave it to the pros, our team does this kind of detail work every day. Our cleaners have 2+ years cleaning homes, and a deep cleaning is where kitchen detail work fits best. Deep cleans start at $312 for an apartment under 700 square feet, and larger homes cost more. If you want appliance interiors included, mention it when you request a quote so it's planned into the visit.
Frequently Asked Questions
How often should I clean my dishwasher filter?
It depends on your brand. Some manufacturers say monthly and others say every few months, so check your manual. We'd look at it monthly, and more often if you run the machine daily or don't scrape plates before loading.
Can I clean my dishwasher with vinegar and baking soda?
Baking soda is a safe, cheap deodorizer for a short hot rinse. Vinegar is debated: some manufacturers and repair techs warn it may wear down rubber seals with repeated use, while others recommend it. Check your manual. Soaking removed spray arms in vinegar in the sink avoids the gasket issue entirely.
Why does my dishwasher still smell after I cleaned it?
The usual culprits are the bottom lip of the door, the folds of the door gasket, a clogged air gap or a drain line that isn't clearing. Also check that the filter is locked back in place. If the machine sits closed and wet for days, especially in a humid Florida kitchen, the smell can return quickly.
How do I know if my dishwasher has a removable filter?
Pull out the bottom rack and look at the floor of the tub, usually near the back or under the lower spray arm. A round cylinder you can twist out means a manual filter. If there's no removable part, your model may use a self-cleaning filter with a grinder, and your manual will explain any maintenance.
Is the black stuff in my dishwasher mold?
Often it's a mix of grease, food residue and microbial growth. Research has found black yeasts and other fungi living in household dishwashers, mainly a concern for people with weakened immune systems. Scrub the gasket and door edge with warm soapy water and a toothbrush, then run a hot cleaning cycle and let the machine dry with the door cracked.