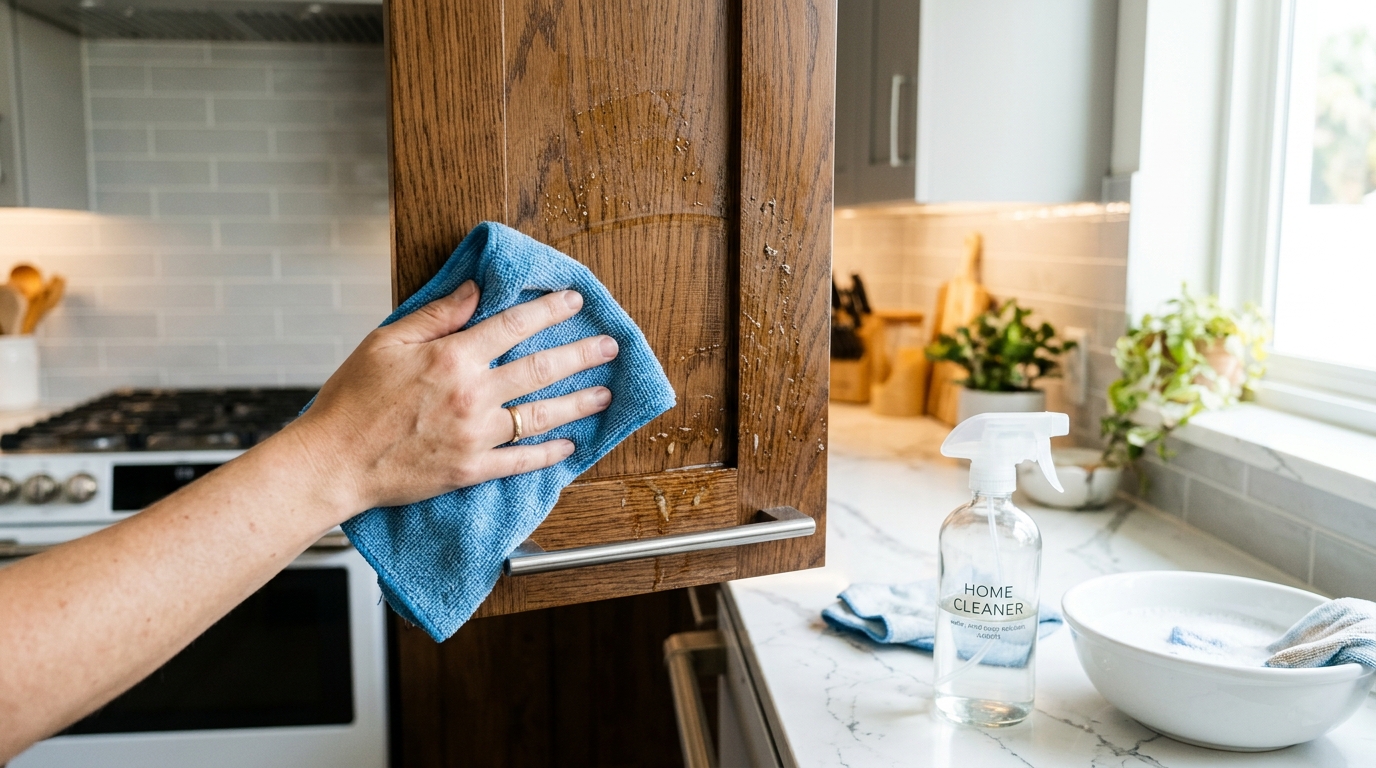
You run your hand along a cabinet door near the stove and it feels tacky. Dust has stuck to it, the corners look yellow-brown, and the wood around the handles has gone dull. If you're wondering how to clean greasy kitchen cabinets without stripping the finish, you're in the right place. The goal is to dissolve the grease, not scrub away the top coat along with it.
We clean kitchens in South Florida homes every week, and cabinets are one of the most common trouble spots. Below we cover how to identify your finish, which cleaners are safe, the exact steps we use, how to handle sticky buildup, and the mistakes that cause the most damage.
Why Kitchen Cabinets Get Greasy (and Why Florida Makes It Worse)
Cooking sends tiny droplets of oil and steam into the air. They drift up and out, then settle on the nearest surfaces: the cabinets above the stove, the doors beside it, and the handles you touch with oily fingers.
Fresh grease wipes off easily. Left alone, it oxidizes and gets sticky, and then it traps dust. That's the brown film you see on cabinet tops and around knobs.
In our experience, humidity makes this worse. In a Miami or Pensacola kitchen with the windows open or the AC cycling, the film tends to stay tacky instead of drying hard, so dust and lint cling to it. That's why a kitchen can look clean on the counters and still feel grimy on the cabinet doors.
Step One: Identify Your Cabinet Finish
The right method depends on what's on your cabinets. Cleaning a painted or thermofoil door like a sealed hardwood one is how most finishes get damaged. Hauslane's cabinet guide, for example, recommends a cleaner made for wood cabinets and warns that excess water can damage wood.
Here's a quick way to tell what you have:
| Finish | How to recognize it | Best approach |
|---|---|---|
| Sealed or stained wood | Visible grain, slight sheen, feels smooth and hard | Mild dish soap, barely damp cloth, dry immediately |
| Painted wood or MDF | Uniform color, no grain under paint, may show brush or spray texture | Very mild soap, soft cloth, no scrubbing |
| Thermofoil | Plastic-like skin, often edges that can peel or lift | Gentle soap, minimal moisture, no heat or steam |
| Laminate | Slick, uniform surface, usually very durable | Soap and water, a little extra scrubbing is fine |
| Unfinished or raw wood | Absorbs a drop of water quickly, looks pale and dry | Dry methods first, then a lightly damp cloth, and rewax or oil afterward |
If you're not sure, look inside a cabinet or on the back of a door. The finish there is the same as the front, but it's much less visible if you need to test something.
What You'll Need
You don't need a cabinet-specific product for light to moderate grease. Gather these:
- Dish soap that's labeled to cut grease. It's built to break up oil and is mild enough for most finishes.
- Warm water in a bowl or bucket.
- Two or three microfiber cloths. They lift grease without scratching, and you want separate cloths for washing, rinsing and drying.
- A soft toothbrush for carved edges, trim and hardware.
- Baking soda for stubborn spots, used as a paste.
- A dry towel for immediate drying.
- Optional: a store-bought kitchen degreaser. If you go this route, look at the label. The EPA's Safer Choice label identifies products that meet the agency's ingredient safety criteria, and you can read more about the program in the EPA's Safer Choice fact sheet.
Skip the steel wool, abrasive sponges, and powder cleansers. They scratch the finish and leave dull patches that are far harder to fix than grease.
How to Clean Greasy Kitchen Cabinets, Step by Step
1. Clear the area and protect the counters
Move small appliances, dishes and anything else that's in the way. Lay a towel along the counter edge so drips don't pool there. Work with good ventilation: turn on the range hood or open a window.
2. Dust first
This step matters more than people expect. If you add water to dusty grease, you get a gray paste that smears. Wipe the doors and cabinet tops with a dry microfiber cloth first, or use a vacuum brush attachment on the grooves.
3. Test in a hidden spot
Try your cleaner on the inside of a door or the bottom edge of a cabinet. Wait a minute or two, wipe, dry, and look for dulling, color transfer or tackiness. It's a 60-second step that can save a whole kitchen's worth of cabinets.
4. Mix a gentle cleaning solution
Add a few drops of dish soap to a bowl of warm water. You want light suds, not a thick foam. Too much soap leaves a film that attracts new dirt.
5. Wipe a small section at a time
Dip a microfiber cloth in the solution and wring it out until it's damp, not wet. Wipe one door or panel, following the grain on wood. Don't let water stand on the surface or run into seams and edges.
6. Rinse and dry right away
With a second cloth dampened in plain water, wipe off the soap residue. Then dry the surface with a clean towel immediately. Moisture left sitting is what lifts paint, swells wood edges and loosens thermofoil.
7. Use the toothbrush on details
For grooves, raised panels and the area around handles, use a soft toothbrush with the soapy solution. Short, light strokes are enough. Wipe and dry the area after.
8. Do the hardware
Knobs and pulls collect the oiliest fingerprints. Remove them if you can, soak them briefly in warm soapy water, scrub with the toothbrush, and dry fully before reattaching. Hardware that's left on should be wiped carefully so the liquid doesn't seep behind it.
For a typical moderately greasy kitchen, we find this takes around one to two hours depending on how many cabinets you have and how long the grease has been there. Work in sections rather than trying to wet the whole kitchen at once.
Tackling Sticky, Baked-On Grease
If soap and water doesn't fully cut it, don't jump to something harsh. Step up gradually.
Baking soda paste
Mix baking soda with a little water until it's like toothpaste. Apply it to the sticky spot with a soft cloth or your finger, rub very gently for 20-30 seconds, then wipe it off with a damp cloth and dry. Baking soda is a mild abrasive, so use it lightly and not at all on high-gloss or painted finishes you haven't tested.
A second pass with soap
Often the best fix is just a longer contact time. Lay a cloth dampened with your soapy solution on the sticky area for a minute or two so the grease softens, then wipe. The Kitchn tested five different methods for greasy cabinets in its cleaning showdown, and the takeaway across a lot of guides like it is the same: patience and gentle products beat aggressive scrubbing.
A store-bought degreaser
Some buildup, especially the cabinet above a range that hasn't been cleaned in years, needs a real degreaser. Choose one that says it's safe for your cabinet finish, test it in a hidden spot, follow the label for dilution and dwell time, and rinse thoroughly. Never combine a degreaser with another cleaner. Our guide to cleaning products you should never mix explains why.
Pro Tip: Clean from the bottom of the cabinet up, not top down. Dirty water running down a wet door leaves streaks, and on a greasy surface those streaks are hard to see until they dry. Starting at the bottom means any drips fall onto an area you'll wipe next anyway.
Finish-Specific Notes
Painted cabinets
Painted cabinets are the most easily damaged by overscrubbing, especially if the paint is older or was done without a hard topcoat. Use the lightest touch, skip the baking soda unless you've tested it, and dry thoroughly. If the paint is already chipping, don't push on the edges.
Thermofoil
Thermofoil is a thin vinyl layer, and heat and moisture can make it peel at the edges. Keep the cloth barely damp, avoid steam cleaners, and don't leave a wet cloth lying against a door.
Natural or stained wood
Follow the grain and dry right away. If the wood looks dull afterward, a wood-safe cabinet polish can help, though you should check what your cabinet maker recommends. Raw wood needs even more caution since it soaks up liquid, so use a barely damp cloth and rewax or reseal as needed.
About vinegar
Plenty of blogs recommend vinegar solutions. In our experience, undiluted or strong vinegar can dull some finishes over time, and it's not necessary when dish soap works. If you want to use it anyway, dilute it well and test first, and check your cabinet manufacturer's care guide, since recommendations vary between brands.
Common Mistakes That Damage Cabinets
- Soaking the cabinet. Wood swells, paint bubbles, and thermofoil lifts. A damp cloth is always enough.
- Using abrasive pads or powders. Scratches and dull spots don't wipe away.
- Skipping the dust step. You end up smearing sludge across the door.
- Skipping the test spot. Every finish reacts differently, and a hidden corner is free insurance.
- Leaving soap residue. The sticky film that remains attracts more grime than before.
- Mixing cleaners. Combining products, especially bleach with anything else, can create harmful fumes.
- Letting the doors air-dry. Especially in a humid South Florida kitchen, trapped moisture is a problem. Always towel-dry.
- Ignoring the cabinet tops and sides. Grease collects above eye level, and neglecting it means it will find its way back down.
How to Keep Cabinets From Getting Greasy Again
Prevention is a lot less work than a deep scrub. A few habits make a big difference:
- Use your range hood every time you cook, and make sure its filter is clean. A clogged filter doesn't capture much. We cover it in our guide on how to clean a range hood filter.
- Wipe the cabinets near the stove weekly with a barely damp microfiber cloth. Catching grease while it's fresh takes seconds.
- Wipe handles and pulls as part of your regular kitchen routine.
- Don't store oil bottles or frequently used cooking items right beside the stove if you can avoid it, since they collect drips.
- Include cabinet fronts in a full kitchen clean. Our walkthrough on how to deep clean your kitchen shows where cabinets fit in the order of work.
If you live near the coast, also keep an eye out for signs of moisture damage, like swollen edges or peeling finish. That's a sign the problem is humidity, not just grease, and it's worth addressing early.
When It's Worth Getting Help
If your cabinets haven't been properly cleaned in years, or you're short on time, a professional deep clean can handle it. Our deep cleaning service includes detailed kitchen work, and our cleaners have 2+ years of experience cleaning homes. We're not the cheapest option, because we pay our cleaners well. Published deep cleaning prices start at $312 for an apartment under 700 sq ft, with larger homes costing more.
Conclusion
Now you know how to clean greasy kitchen cabinets without harming the finish: identify the material, dust first, test a hidden spot, use gentle soap with a barely damp cloth, and dry right away. Escalate slowly for stubborn spots and avoid soaking, scouring, and mixing products.
Do it regularly and the job gets quicker every time. And if you'd rather leave it to the pros, you can request a quote and we'll take care of your kitchen for you.
Frequently Asked Questions
What is the best homemade cleaner for greasy kitchen cabinets?
A few drops of grease-cutting dish soap in warm water is the safest and most effective option for most finishes. For stuck-on spots, a light baking soda paste can help on durable surfaces. Always test first in a hidden area.
Can I use vinegar to clean greasy cabinets?
Some people do, but we don't recommend it as a first choice. Strong vinegar can dull certain finishes, and dish soap usually works just as well. If you try it, dilute it, test it, and check your cabinet manufacturer's care instructions.
How often should I clean kitchen cabinets?
Wipe cabinets near the stove weekly, and clean all cabinet fronts and handles monthly. A full degreasing, including cabinet tops, is worth doing a few times a year, more often if you cook with oil a lot.
How do I remove sticky residue from cabinets without ruining the paint?
Hold a cloth dampened with warm, soapy water against the sticky area for a minute or two to soften it, then wipe gently. Avoid scrubbing, rinse with a damp cloth, and dry right away. If paint starts to come off on the cloth, stop and try a gentler approach.
Why do my cabinets feel sticky even after cleaning?
Usually there's leftover soap residue or grease that wasn't fully removed. Wipe again with a cloth dampened in plain water, then dry thoroughly. In humid climates, drying with a towel matters even more.